I put my parents on a plane to France a few days ago. They're going to be gone for three weeks - driving around the country, eating and exploring and trying to speak some semblance of French. I have been several times, but won't be going this year; I just get to shuttle them to and from the airport and take care of the dogs. As I watched my parents walk away and suppressed the urge to run and beg for the thirtieth time to hide in their suitcases, I decided I was going to bring France home to all of you instead. (You didn't know you were going on vacation today, did you?)
We're starting with the baguette. It's a worldwide symbol of France, and they're impossible to avoid when you're there. Not that anyone minds! If all you've ever had is a sad, soft grocery store "baguette", you really have no idea what you're missing. A proper French baguette has a very hard, crispy crust, with a soft, chewy inside with almost as many air bubbles as there is actual bread. The most traditional version is a deceptively simple recipe with only four ingredients: flour, salt, yeast, and water. The genius of baguettes is in the technique. It'll likely take you more than one attempt to get right, but no fear - even a not-quite-right baguette still tastes delicious! If you have trouble with yeast, you can convert your oven into a proof box (what professional bakers use to get good rises) by putting a bowl of boiling water on the lowest rack and shutting the door. The heat and humidity will help encourage your bread to rise!
With no further ado, here is my recipe for baguettes (translated and adapted from www.meilleurduchef.com)
Ingredients:
4 cups* of bread flour**
300 ml of water
1 tsp salt
2.5 tsp dry yeast
1 egg, beaten (optional - I normally don't bother unless the loaf is meant for someone else)
1 egg, beaten (optional - I normally don't bother unless the loaf is meant for someone else)
*note: it is, in fact, far better to weigh your flour than use volume measurements like cups. However...I don't own a kitchen scale yet. I know, it's shameful. It's on my list, I promise! The original recipe called for 500 grams of bread flour
**yes, the bread flour makes a difference! If you must, it'll work with AP flour, but you'll lose some of that awesome chewy texture.
Instructions:
1. Mix the salt into the flour, and form a well in the middle of the mixture.
2. Heat the water until it is warm, but not hot, to the touch. (Usually 15-30 seconds in the microwave will do it)
3. Add the yeast and the warm water to the well in the flour mixture.
4. Using your fingertips, stir it around until the flour starts to incorporate. Continue mixing by hand, slowly adding the flour until it is all incorporated and you are left with a ball of dough. It will likely start off looking like this:
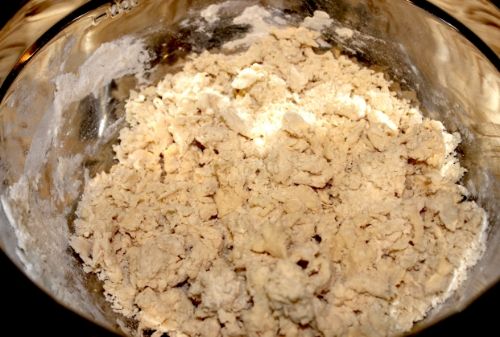
Don't worry, there should be more than enough moisture in there to form the dough ball. Just start gathering up dough and squishing it all together until you're left with a rough, sticky lump.
5. Kneed the dough for about 5 minutes. When you're done, it should be soft and elastic and no longer sticky to the touch (tacky is fine, but it shouldn't be sticking to anything). Dust some flour over a clean surface and turn out the dough if you didn't before. Using your fingers, split the dough in half.
7. Still using your fingers, pat each chunk of dough out into a rectangle. Fold the long edges of the rectangle together, so you're left with a long, thin rod of dough. (the word "baguette" actually means "rod", not "bread")
8. Pinch the ends of each rod into a point.
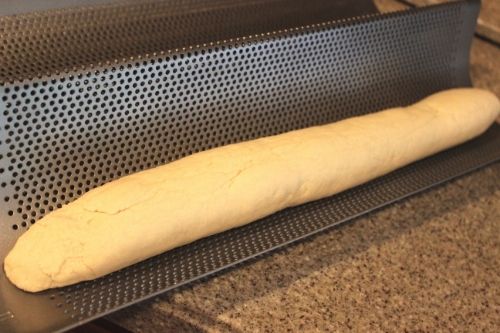
9. If you have one, put your loaves into a baguette pan like this one on Amazon. If you don't have on, that's alright, just use a regular sheet pan, but you won't get the nice, crispy crust on the bottom of your loaves. It should look something like this:
10. Put them back in the warm place to rise for about 40-60 minutes. Here's how I make my proofing box: the bread goes on the top rack. A bowl or container of some kind goes on the bottom rack. I like using the bowl I mixed the dough in, for sheer laziness - I don't have to find another one, and the hot water helps wash it out before I even get started on the dishes! Your oven should look like this:

Pull out the bottom rack for safety's sake, and pour boiling water into your bowl.

CAREFULLY push the rack back into place and shut the oven door. You may want to replace the boiling water as it cools - for baguettes, I normally do two rounds of water to maintain the heat and humidity.
I tried to take a picture of this for you, but it just looks like an oven door. Hopefully you know what that looks like!
Pull out the bottom rack for safety's sake, and pour boiling water into your bowl.
CAREFULLY push the rack back into place and shut the oven door. You may want to replace the boiling water as it cools - for baguettes, I normally do two rounds of water to maintain the heat and humidity.
I tried to take a picture of this for you, but it just looks like an oven door. Hopefully you know what that looks like!
12. Cut some shallow incisions in the top of the bread to allow for the final rise in the oven.
13. Optional: Brush the top of the loaf with a beaten egg (it doesn't change the flavor, but makes the crust darker)
14. Bake at 400 until golden brown, about 25-35 minutes.
14. Bake at 400 until golden brown, about 25-35 minutes.
If you aren't sure if the bread is done, there is a quick and easy test: pick it up (wearing your oven mitt, of course!) and tap on the bottom of the loaf. It should make a hollow sound.
Another bit of baguette trivia: it is practically a law of physics, particularly in Paris, that when one buys a fresh-baked baguette from their favorite boulangerie, you cannot leave without twisting off one of the knobby ends and eating it on the spot. There is even a word for it - le quignon!
Enjoy quickly! Baguettes do not last long - about a day at the very most. If you still have bread left over tomorrow, it will be distressingly stale...but perfect for, say, pain perdu (known to most Americans as French toast) or homemade bread crumbs.
No comments:
Post a Comment