
I love empanadas because they're delicious, first off all, but they're also incredibly versatile. You can put pretty much anything you want inside an empanada, and they are much easier to make than they look.
Most empanada doughs involve cutting butter into flour as if you were making biscuits. This is really not a difficult process, as long as you have a pastry blender. The talented among us can achieve the same results with two knives, or by mixing it by hand. I have tried all of these methods, and the only one I can get to work consistently is the pastry blender. (This is actually the only reason I even own a pastry blender.) But no worries! If you are one of those people whose reaction to the instruction "cut in butter" is to immediately back away and reach for the take-out menu instead, I have you covered. Actually, the good folks over at Use Real Butter have you covered, with their delicious dough solution that's so easy, you could do it in your sleep.
Dough (stolen almost exactly from Use Real Butter)
1 cup water
3/4 cup butter or lard
2 3/4 cup flour
2 tsp salt
pinch of spices/herbs (they used paprika; since I was pairing it with Greek salad, I used oregano)
1. Combine flour, salt, and spices/herbs in a mixing bowl, forming a well in the center.
2. Heat water and butter in a saucepan just until the butter is melted.
3. Pour about 1/4 of the melted butter/water into the flour. Mix carefully by hand - remember, it's still hot!
4. Continue pouring in the butter mixture, adding about 1/4 of the liquid every time, until all the liquid is incorporated into the dough. It will be extremely sticky and wet, and you will think you've completely messed it up. Don't worry! It's supposed to look like that. Really. If you keep mixing it and nothing's changing, you're good.

5. Carefully pour the dough onto a piece of saran wrap and wrap it up into a ball. (I like to double wrap mine to safeguard against holes or leaks) Refrigerate for about 2 hours.
While that's hanging out in the fridge, make your filling. You don't want the filling to be too wet, or they'll make the bottom of your pastries soggy after they're baked. Thankfully, there's not too much we have to change to make Greek salad work in this application.
Greek Salad Filling
1 cup diced cucumber
1 cup diced tomato
1/2 cup diced red onion
1 cup diced bell pepper (any color you like; I prefer orange)
splash of red wine vinegar
pinch of oregano
salt (I use kosher salt, but table salt would be fine)
black pepper
*traditionally, Greek salad should include olives. I hate olives, so I leave them out. Feel free to add them back in if you like them.
**I also meant to include feta, but just plain forgot. It was still delicious, but you could definitely add it back in as well!
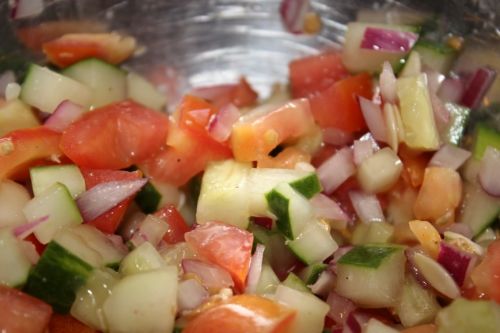
1. Toss cucumber, tomato, red onion, and bell pepper in a bowl.
2. Splash with red wine vinegar. You want enough to get the flavor, but not enough to soak the veggies. (It's okay if you overdo it a little; you'll just want to let it settle to the bottom of the bowl and drain it out before putting the filling into the empanadas)
3. Season with oregano, salt, and pepper to taste.
4. Let rest in the fridge until the dough is ready. Try not to eat it ahead of time.
Assembling and Baking
1. Flour your workspace and a rolling pin. If you don't have a rolling pin, pretty much anything hard and cylindrical will work, as long as it's bigger than your finished product. (I routinely use a beer bottle.)
2. Unwrap your dough and split into 12 pieces. Your dough will still be sticky, but should pull away from the saran wrap fairly easily by now.
3. Roll each piece out in a circle about 1/4 of an inch thick. See my beer bottle rolling pin in the background?

4. Place 3 tablespoons (more or less; as you make more, you'll learn to eyeball the amount pretty easily) of filling slightly to one side of the circle.
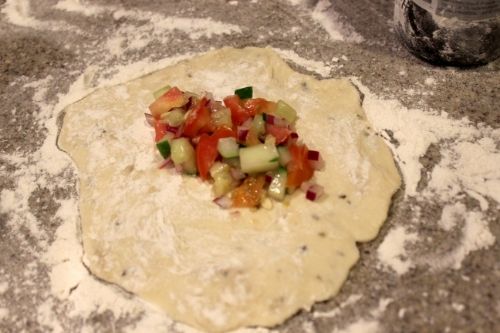
5. Fold the other side over the filling and pinch the overlap together.
6. To form the best seal, use a fork to crimp the edges shut. I like a thick edge on mine, but that's a slightly odd personal preference. Feel free to make yours as thin or as thick as you'd like!
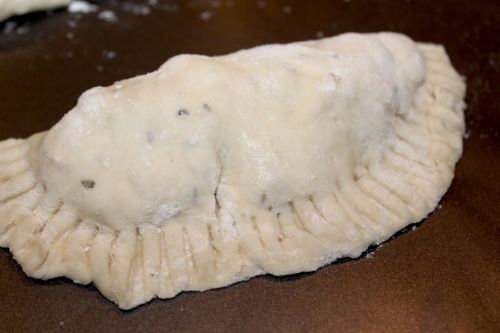
7. Bake at 375 for about 25 minutes, or until golden brown and flaky.
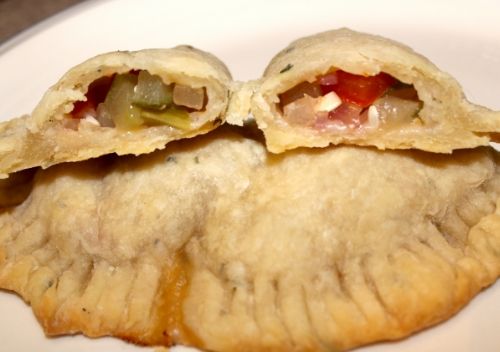 Deliciousness!
If you run out of filling - I made a few of mine a little big, and had a dough circle leftover - you can make an empanada desert for a second course! I sliced up a little bit of banana, sprinkled it with sugar, and topped it with some dark chocolate chips. Fill and bake the exact same way.
Another reason to love empanadas: they freeze really well! So if you aren't feeding enough people to need 12 empanadas, just bake off the ones you do want and stick the rest in the freezer on parchment paper. Make sure they aren't touching, or they'll freeze together. Once they're solid, wrap individually in saran wrap and place in a freezer bag. Whenever you get a craving for empanadas, or simply don't feel like cooking anything new, just pull them out and stick them in the oven. You don't even have to defrost them; just add a few more minutes to the cooking time to compensate.
Another reason to love empanadas: they freeze really well! So if you aren't feeding enough people to need 12 empanadas, just bake off the ones you do want and stick the rest in the freezer on parchment paper. Make sure they aren't touching, or they'll freeze together. Once they're solid, wrap individually in saran wrap and place in a freezer bag. Whenever you get a craving for empanadas, or simply don't feel like cooking anything new, just pull them out and stick them in the oven. You don't even have to defrost them; just add a few more minutes to the cooking time to compensate.
*drool*
ReplyDeleteSeriously, this looks both delicious and easy enough I could actually manage it. Love the alternative to "cut in butter"!
:D